unreliably. The resistance in the cables that connect the Pi to the power
supply varies greatly too, and this can prevent peripherals like the
mouse from working.Don’t try to power
the Pi by connecting its Micro USB port to the USB port on your PC with
a cable, because your computer probably can’t provide enough power
for your Pi.
*Cables: You’ll need cables to connect it all up, too. In particular, you
need an HDMI cable (if you’re using an HDMI or DVI monitor), an HDMI
to DVI adapter (if you’re using a DVI monitor), an RCA cable (if you’re
connecting to an older television), an audio cable (if connecting the
audio jack to your TV or stereo), and an Ethernet cable (for networking).
You can get these cables from an electrical components retailer and
might be able to buy them at the same time as you buy your Raspberry
Pi. Any other cables you need (for example to connect to PC speakers or
a USB hub) should come with those devices.
*External hard drive: If you want lots of storage, perhaps so you can use
your music or video collection with the Raspberry Pi, you can connect
an external hard drive to it over USB. You’ll need to connect your hard
drive through a powered USB hub, or use a hard drive that has its own
external power source.
*Speakers: The Raspberry Pi has a standard audio out socket, compatible
with headphones and PC speakers that use a 3.5mm audio jack. You can
plug your headphones directly into it, or use the audio jack to connect
to speakers, a stereo, or a TV. If you’re using a TV or stereo for sound,
you can get a cable that goes between the 3.5mm audio jack and the
audio input(s) on your television or stereo. You won’t always need
speakers: If you’re using an HDMI connection, the audio is sent to the
screen with the video signal so you won’t need separate speakers, but
note that this doesn’t work if you use a DVI monitor.
*Case: It’s safe to operate your Raspberry Pi as-is, but many people prefer
to protect it from spills and precariously stacked desk clutter by getting
a case for it. You can buy plastic cases on eBay (www.ebay.com), most
of which are transparent so you can still admire the circuitry and see
the Pi’s LED lights. These cases typically come as simple kits for you to
assemble. The Pibow (www.pibow.com) is one of the most attractively
designed cases, with layers of plastic giving it a rainbow look, side-on (see
Figure 1-4). It’s designed by Paul Beech, who designed the Raspberry Pi
logo. You don’t have to buy a case, though. You can go without or make
your own (see Chapter 3). Whatever case you go with, make sure you can
still access the GPIO pins so you can experiment with connecting your Pi
to electronic circuits and try the projects in Part V of this book.
A list of compatible and incompatible devices is maintained at
click and you can check online
reviews to see whether others have experienced difficulties using a particular
device with the Raspberry Pi.
Downloading the Operating System
Before you can do anything with your Raspberry Pi, you need to provide
it with an operating system.
The operating system used on the Raspberry Pi is GNU/Linux, often called
just Linux. The Raspberry Pi might be the first Linux computer
you’ve used, but the operating system is good and powerfull.
There are several different Linux distributions available for the Raspberry
Pi, and you can find an officially endorsed list at this
page.
The officially distribution recommended for beginners is called Raspbian
Wheezy. IA Debian based Linux OS.
To download the distribution you want to use. If you’re using
a recommended distribution, start by pointing your web browser to
downloads page. This page lists several different distributions, and each one has
two ways to download it,You can use a BitTorrent file And You can also use a direct download.
Unzipping Your Linux OS
When you download your Linux OS, it may be contained
in a Zip file, just Unzip it by double-
clicking the Zip file, it should show you the Linux distribution file and give you a
button to click to extract (or unzip) it.
If you have more than one file inside the Zip file. In that case,
the one you need is the one that has .img at the end.
Flashing Your SD Card
windows
To flash an SD card in Windows, you’ll need to download and install Image Writer for Windows to do the job. is available for free download.
NOTE:The software is alpha software, which means it’s still in a fairly early stage of
development, so make sure you have a current backup of your computer, just
in case something goes wrong.
steps you need to follow using Image Writer:
1.
Visit this
website and download the latest version of Image Writer.
Download the binary is the one you need.
2. Click Extract All the Files into a folder and open it.
3. Double-click the file Win32DiskImager.exe to start it.
If you are asked to give the program permission to make modifications
on the computer, allow it.
The long white box is for the filename of your
Linux distribution image.
.
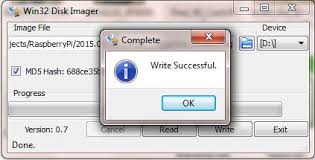
4. Click the folder icon on the right of the filename box to open a file
browser, navigate to your Linux distribution .img file and double-click it.
5. Use the device menu on the right to choose which drive your SD card
is in.
Double-check this information, and then check it again. Remember: This
drive is going to be completely wiped.
You can go through the Start menu to My Computer to check the letters assigned to the different drives on your PC. As a failsafe, this menu
should only list removable drives, so you shouldn’t usually have an
option for your hard drive here
6. Click the Write button, and Image Writer starts its work.
Flashing an SD card using Linux
We’re using Ubuntu, the most popular desktop distribution make
sure you have a recent backup of your computer before you proceed, just in
case you accidentally wipe the wrong disk.
follow the walkthrough.
Linux is case-sensitive, so you need to use upper- and lowercase as we have in
these instructions. For example, you can’t use LS in place of ls.
1. Remove any SD cards or USB keys that you won’t be using for this
process from your computer.
2. Insert the SD card you want to erase and install the Linux distribution
onto.
3. Open a terminal window.
use the keyboard shortcut (Ctrl+Alt+T in Ubuntu).
4. Enter sudo fdisk –l, where the last character is the letter l.
This gives you a list of the disks available, as you can see in Figure 2-2.
5. Study this list to find your SD card.
In Figure 2-2, the screen lists three disks, with the information about
each one starting with the word Disk. The file size is usually a good indi-
cator of which is your SD card. The first one (Disk /dev/sda) is 500.1GB,
which is a large hard drive. The second one (Disk /dev/sdb) is 1000.2GB,
which is a huge hard drive. The third one (Disk /dev/sdg) is just 8068MB.
8068MB is roughly 8GB, so that’s the SD card. Take a note of the disk’s
directory, which in this case is /dev/sdg.
6. Use cd to go to the directory where you stored your Linux distribution
image.
We put ours in the Documents directory, so we used cd Documents, as
you can see in Figure 2-2.
7. To see the name of your image on screen, enter ls *.img.
8. To actually write the Linux image to the SD card, use
sudo dd if=distribution.img of=/dev/sdX bs=2M
You need to replace distribution.img with the name of your distribution
(in our case 2012-09-18-wheezy-raspbian.img) and replace sdX with the
directory of your SD card, which was sdg when we did it.
Double-check this: The content of the device you name here is erased
and replaced with the Raspberry Pi Linux distribution when you press
Enter.
You can copy and paste the distribution filename from where it was
listed onscreen in Step 7. Use the mouse to highlight it, and then right-
click to copy. Right-click in the sudo dd command to paste in the file-
name. Alternatively, if you start to type the name and then press the Tab
key on the keyboard, Linux attempts to complete the name for you.
The screen won’t update
during Flashing, but if your SD card slot has a light beside it, you might see
it flickering. When it’s finished, you may see a short statement onscreen
telling you how much data was copied, and a proud declaration of
how quickly it was finished.
Connecting The Raspberry Pi
To insert your SD card, flip your Raspberry Pi over (see Figure 3-2) so you’re
looking at its underside. On one of the short sides is a plastic fixture for your
SD card. Slide the SD card in with the label side facing you and gently press
the card home to make sure it’s well connected.
Connecting an HDMI or DVI display
On the top surface of your board, in the middle of the bottom edge is the
HDMI connector. Insert your HDMI cable into that, and then
insert the other end into your monitor.
If you have a DVI display, rather than a HDMI display, you need to use an
adapter on the screen end of the cable. The adapter itself is a simple plug,
so you just plug the HDMI cable into the adapter, and then plug the adapter
into your monitor and turn the silver screws on the adapter to hold the cable
in place. Figure 3-3 shows the HDMI cable lined up for insertion into the DVI
adapter.
Connecting a USB Hub
Your Raspberry Pi’s USB socket(s) can be found on the right of the circuit
board. Your USB hub should have a USB cable that connects
snugly into one of these sockets.
It’s important to use a USB hub that has its own power source, so plug your
USB hub into a wall socket (mains electricity) using the power supply unit
that came with it.
Connecting a Keyboard and Mouse
Your keyboard and mouse can be connected directly to the USB socket(s)
on your Raspberry Pi; however, it’s better to connect them to your external-
powered USB hub that is connected to the Pi. It reduces the risk of problems
caused by the devices drawing too much power from the Pi.
Connecting Audio
If you’re using a HDMI television, the sound is routed through the HDMI cable
to the screen, so you don’t need to connect a separate audio cable.
Otherwise, the audio socket of your Raspberry Pi is a small black box stuck
along the top edge of the board. If you have earphones or headphones from a portable music player, you can plug them directly into
this socket.
Alternatively, you can plug a suitable cable into this socket to feed the audio
into a television, stereo, or PC speakers for a more impressive sound.
Connecting to Your Router
The Raspberry Pi Model A has no network connection on the board. The
Model B Raspberry Pi has an Ethernet socket on the right edge of the board.
Use this socket to connect your Raspberry Pi to your
Internet router with a standard Ethernet cable.
The Raspberry Pi automatically connects to the Internet when used with a
router that supports the Dynamic Host Configuration Protocol (DHCP), which
means it works with most domestic routers.
Connecting the Power and Turning
on the Raspberry Pi
The last thing you should do is connect the power. The Micro USB power
socket can be found in the bottom-left corner of the board.
The Raspberry Pi has no on/off switch, so when you connect the power, it
starts working. To turn it off again, you disconnect the power.
Using Raspi-config to SetUp Raspberry Pi
The first time you use the Raspberry Pi, it goes into a program called Raspi-
config, which you use to change some of the settings on your Raspberry Pi.
Note: That you can’t use the mouse to move through these menus. You use up
and down keys to select different options on the screen, and left and right or
Tab to select actions such as OK,
Cancel, Select, and Finish. Press Enter to confirm a choice.
info: This is a short paragraph explaining the purpose of the
tool. After you’ve read it, press Enter to return to the menu.
expand_rootfs:This option in Raspi-config is used to ensure
your Raspberry Pi can use all the space on your SD card. When you
press Enter with this option highlighted, it runs straight away. The next start up (or boot), your Raspberry Pi resizes the
file system.
overscan: The overscan settings control how much of a border
should be used around the screen image and can be used to correct an
image that spills off the side of the monitor.
configure_keyboard: When you press Enter, there is a short pause,
and then a menu opens for you to select the keyboard you’re using.
Press Enter to confirm your choice.
change_pass: This option enables you to change the password for the
default user on your Raspberry Pi, which is the user called pi.
change_locale: This setting is used to choose your language and its
associated character set.
change_timezone: This option used to tell your Raspberry Pi what time zone
you’re in when you first set it up.
memory_split: You can improve your
Raspberry Pi’s performance by giving more of the memory to the GPU with this option.
overclock: Overclocking is making a computer work faster than the
manufacturer recommends by changing some of its settings
ssh: SSH is a way of setting up a secure connection between computers,
usually so you can control one computer from another computer. The
settings let you enable or disable this, but unless you know you need to
use it, you can ignore this setting.
boot_behaviour: This setting is used to make your Raspberry Pi go
straight into the desktop environment.
update: Use this setting to install an update to Raspi-config if one is
available.
You can use Raspi-config at any time. To start it, enter the following at the
Linux command line:
sudo raspi-config
Logging In
When you switch on the Raspberry Pi, you might be asked for a username
and password. The default username and password differ depending on which
version of Linux you are using, but for the Raspbian Wheezy distribution,
the username is pi and the password is raspberry. Both of these are case-
sensitive.  You receive no feedback on the
screen as you enter the password. It not hides your password and
doesn’t show you that a key press happened, which is a bit unsettling the first
time. You are shown the command line prompt followed by a
blinking line after a successful logging in :
You receive no feedback on the
screen as you enter the password. It not hides your password and
doesn’t show you that a key press happened, which is a bit unsettling the first
time. You are shown the command line prompt followed by a
blinking line after a successful logging in :
pi@raspberrypi ~ $
 This means your Raspberry Pi is ready for you to use and you can enter
Linux commands now to manage your files and programs.
This means your Raspberry Pi is ready for you to use and you can enter
Linux commands now to manage your files and programs.
Desktop Environment

Before you leave, do me a favor and answer me this question:
What’s your opinion of Bitcoin?
~Is it here to stay — permanently — or is it just another passing fad?
Leave your comment below (Please! Don’t forget to use the social sharing buttons, either)!